 It’s now been a few months since Penrose & Associates launched the new iPhone and Android App. Since then, clients and contacts have downloaded it across the NY/NJ tristate area.
The App has generated some fantastic feedback from users enjoying its many features for free.
As a modern, forward thinking firm we are always looking for new and improved ways of doing things. So when we launched our Apple and Android-Approved App, one of the important features was Receipt Management – A super easy way that all businesses (both clients and non-clients) could store and manage their receipts. And here it is, the Penrose & Associates Receipt Manager.
How does the Penrose & Associates Receipt Manager work?
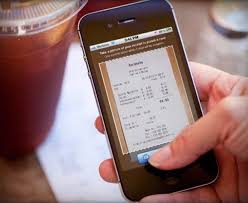
First, you need to download the relevant App (see above). Once you have the App, simply click on the home page icon labeled ‘Receipt Manager’. This will open a window just like the one opposite.
Before you get started, enter your name and company name into the ‘My settings’ section of the receipt tool.
Photograph a Receipt
You can take a photo using the ‘Photograph a Receipt’ button. Selecting this will automatically open the ‘Categories’ tab where it will prompt you to select the category you wish to save your receipt under something like Travel Expenses, Property Costs, Personal Receipts and so on.
Once you have selected the category for your receipt, you can then photograph it automatically, using the inbuilt camera in your Smartphone or tablet. Once you have focused and taken the picture of your receipt, it will give you the option to ‘use or retake’. Once ‘use’ is selected, you must now fill in relevant data regarding the receipt.
We have made these fields compulsory, as this data is enormously helpful if you are keeping track of numerous receipts. It also gives you the chance to add a specific note – a very useful feature if you have a receipt that your accountant might later question.
Once the data is entered, simply click ‘save’ and your receipt is saved. They can later be found within the category you selected to save it under.
Exporting & Managing Receipts
To view, export and manage your receipts simply click ‘Manage Receipts’ then click on a specific category i.e. Travel Expenses. All receipts in that section will be shown.
Exporting your receipts is simple, fast and easy. To export a single receipt, simply click on the receipt to manage, then scroll down and you have 3 options – Email, Export or Delete.
Exporting all receipts
To export all your receipt data, simply click ‘Manage Receipts’, then scroll down to the bottom, and select ‘Export All’. This will allow you to select the date range of the receipts you wish to export.
The image of your receipt(s) is stored locally on your device, in your ‘photo’ section. To send these images, simply send by email when on a good Wi-Fi connection, use ‘photo-stream’ if it’s an iOS product, or one of the free and hugely popular cloud storage tools such as DropBox.